The World of 3D Printing: Creating Objects from Your Imagination
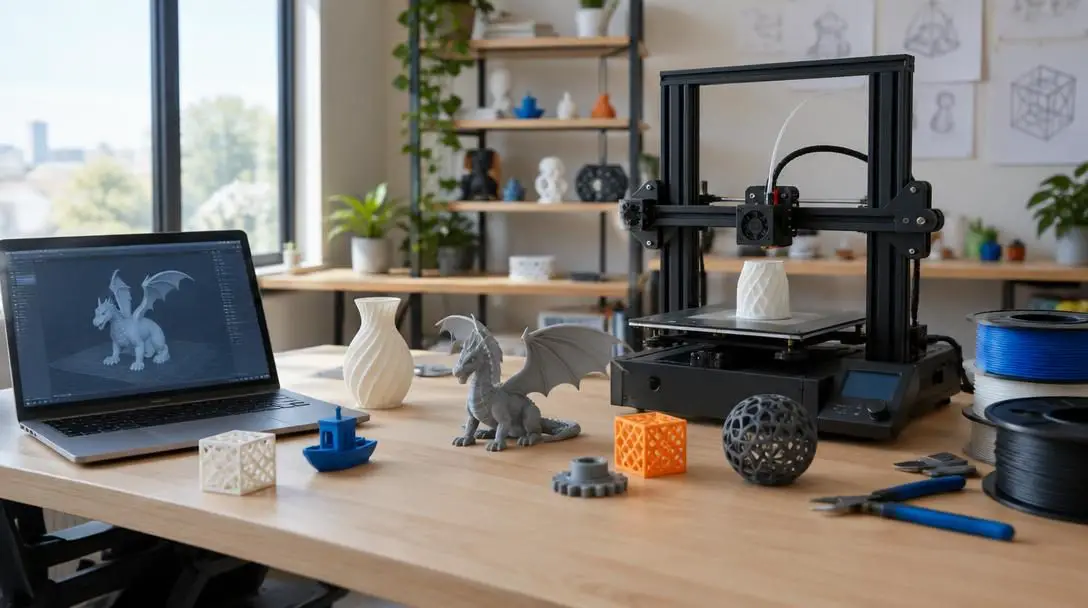
Since its inception, 3D printing has revolutionized the way designers, engineers, and creators think about manufacturing, design, and production. Instead of carving away material from a bulk slab or pouring molten substances into expensive, fixed molds, 3D printing constructs three-dimensional items straight from digital blueprints. By bridging the gap between computer-aided visualization and physical reality, additive processes empower individuals and industrial enterprises to iterate rapidly and fabricate geometries without traditional mechanical constraints.
Today, the technology has expanded far beyond basic conceptual modeling. Modern 3D printers process everything from basic thermoplastics and liquid resins to powdered metals, ceramics, and even edible materials. Understanding how these systems operate, the distinct technical trade-offs between different additive methods, and the practical steps required to ensure print success allows creators to unlock the full potential of digital fabrication.
Key takeaways
- Additive manufacturing builds parts layer by layer directly from CAD models, eliminating the scrap material of subtractive methods and the costly retooling of formative molding.
- Primary 3D printing mechanisms include material extrusion, powder bed fusion, and vat photopolymerization, each suited to different structural and aesthetic requirements.
- While 3D printing excels at producing custom components and complex internal geometries, operators must navigate challenges such as anisotropic weakness, material costs, and post-processing demands.
- A dependable print workflow relies on meticulous CAD preparation, careful slicer configuration, precise bed leveling, and adequate first-layer monitoring.
The Manufacturing Paradigm: Subtractive, Formative, and Additive
To appreciate how 3D printing transforms fabrication, it is helpful to look at how physical goods have traditionally been produced. For generations, conventional production has relied primarily on two standard frameworks: subtractive manufacturing and formative manufacturing. Each has distinct mechanical strengths, but both impose structural constraints that modern digital production seeks to overcome.
Subtractive manufacturing begins with a solid block, sheet, or rod of raw material—such as metal, wood, or dense plastic. Computerized milling tools, lathes, drills, or manual chisels carve away the unwanted mass until only the desired component remains. While subtractive machining achieves remarkable precision and produces mechanically robust parts, it generates significant volumes of scrap shavings. Furthermore, cutting tools cannot easily access hollow internal cavities or carve intricate interior lattices without cutting the part into separate subassemblies that must later be welded or bolted together.
Formative manufacturing relies on molds, dies, and heavy mechanical presses to shape liquid, molten, or pliable raw materials into their final form. Processes like injection molding, die casting, and stamping are capable of churning out millions of identical parts at exceptionally low per-unit costs. However, creating the initial tooling requires months of precision machining and substantial capital investment. If an engineer discovers a design flaw or needs to alter a dimension by a single millimeter, the existing mold must often be scrapped and machined anew, causing lengthy lead times and costly downtime.
Additive manufacturing inverts these approaches by building an object from nothing, joining raw material together layer upon layer. Instead of cutting down from a larger mass or forcing raw matter into a rigid chamber, additive systems deposit or cure material only where the digital geometry dictates. This shifts physical production into a direct extension of computer software, giving designers unprecedented freedom to update, personalize, and produce components on demand.
Additive processes build directly from raw code to solid matter, transforming physical manufacturing into an agile extension of digital design.
Primary 3D Printing Technologies Explained
While all 3D printing systems rely on an incremental, slice-based fabrication sequence, they use completely different physical and chemical mechanisms to consolidate raw feedstocks into solid parts. The three most common technologies represent distinct balances of cost, detail, mechanical performance, and operating complexity.
Extrusion
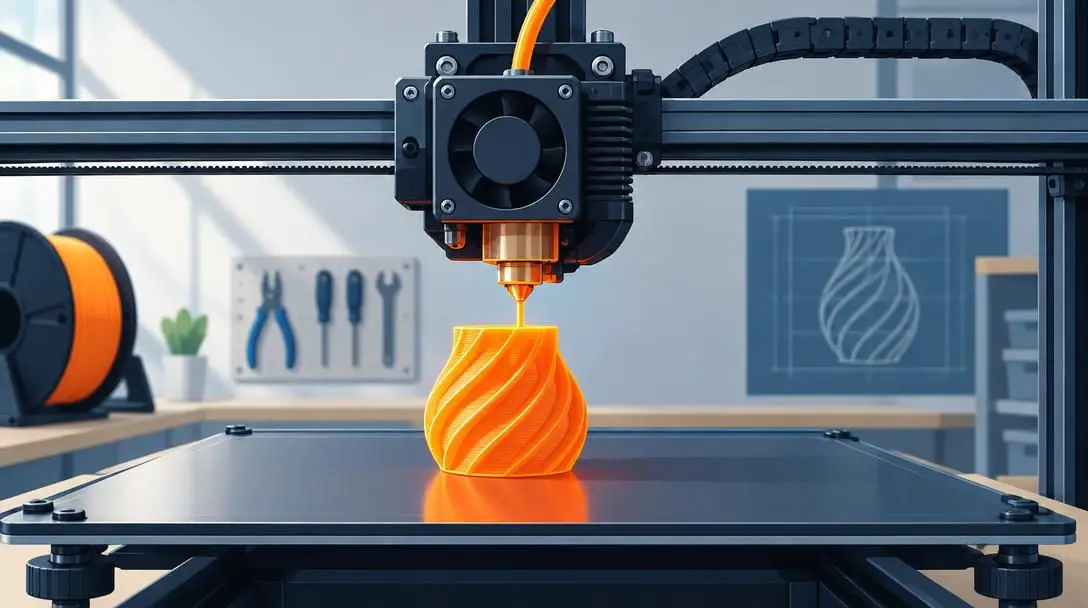
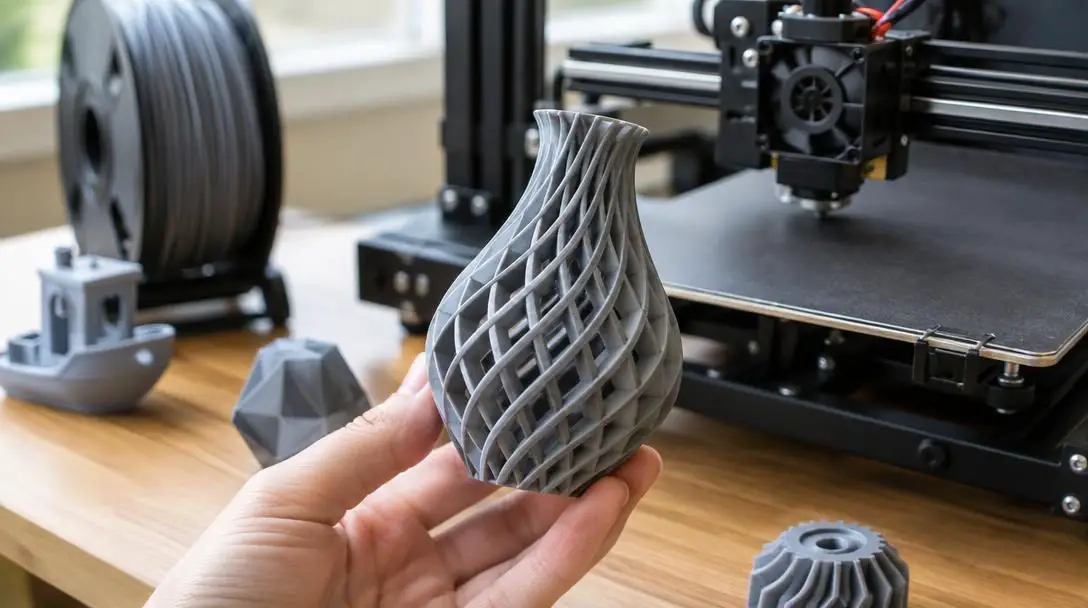
Extrusion-based printing—often referred to as fused deposition modeling or fused filament fabrication—is the most recognizable and widely deployed 3D printing method. In this system, a continuous spool of thermoplastic filament is fed into an extruder assembly, where an internal heating block melts the plastic into a semi-liquid state. A motor pushes this melted material through a fine nozzle onto a flat build platform.
The print head traces out the precise cross-section of the sliced model, laying down a thin track of molten plastic that quickly bonds to the layer beneath it and cools into a solid form. Once a layer is complete, the build platform lowers incrementally (or the print head rises), allowing the next layer to be applied. Extrusion printers are celebrated for their affordability, ease of maintenance, and broad range of standard and reinforced thermoplastics, making them common in workshops, schools, and design labs.
Powder Bed Fusion
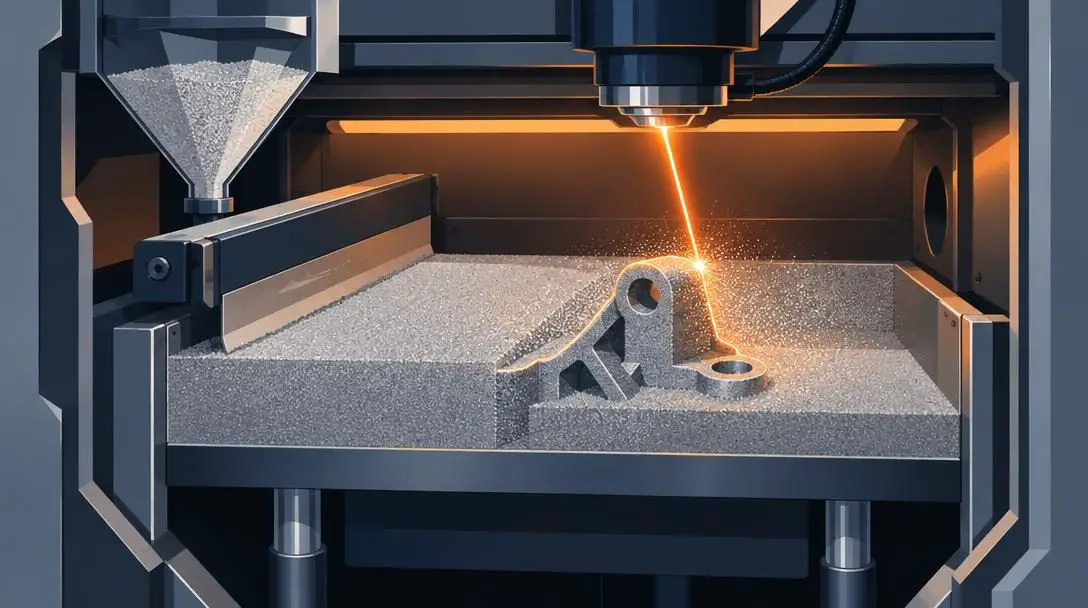
Powder bed fusion uses finely ground particles of polymer, ceramic, or metal spread across a build chamber to construct parts. A recoating blade or roller applies a microscopic layer of powder over the build area. A high-energy thermal source, such as an infrared laser, fiber laser, or focused electron beam, scans across the powder bed, selectively melting or sintering the loose particles together according to the sliced digital cross-section.
After the scan is complete, the build floor lowers slightly, another layer of powder is spread over the surface, and the laser fuses the subsequent layer directly to the consolidated material below. Because the part remains fully encased in un-sintered loose powder throughout the print cycle, powder bed systems do not require sacrificial support structures for complex overhangs or internal voids. Once the print is finished, operators excavate the part from the powder cake and clean off the remaining loose media. This method is common in aerospace, medical implants, and high-performance industrial tooling where high strength and geometric complexity are mandatory.
Vat Photopolymerization
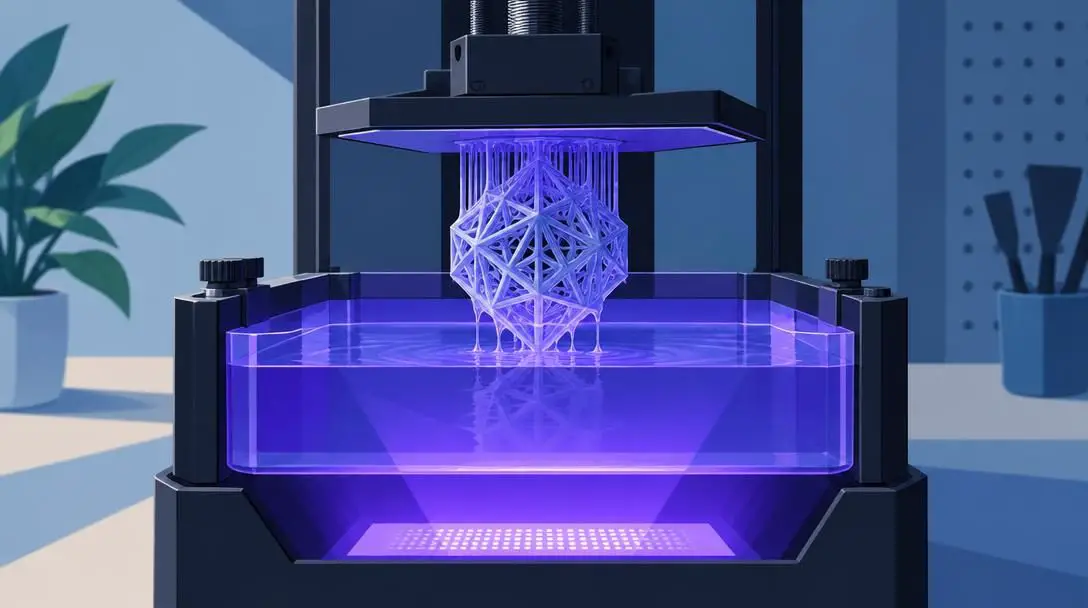
Vat photopolymerization builds components by selectively exposing liquid photopolymer resins to controlled wavelengths of light, typically ultraviolet radiation. The printer features a transparent vat containing liquid resin and a build plate that moves vertically along a rigid Z-axis. A light source—such as a steered UV laser, a digital light processing projector, or an LCD masking screen—projects the specific pattern of the layer onto the bottom or top of the liquid container.
When the reactive molecules in the resin absorb the light, they undergo chemical cross-linking, curing instantly from a liquid state into a rigid plastic layer. The build platform moves incrementally, drawing fresh liquid across the optical window to solidify the next slice. Vat photopolymerization produces smooth surface finishes, crisp visual details, and fine layer resolutions that render individual layer lines virtually invisible to the naked eye. Consequently, it is the primary choice for dental models, jewelry investment casting patterns, miniature figurines, and high-precision visual prototypes.
| Technology | Primary Material State | Support Structure Requirement | Key Strengths | Common Drawbacks |
|---|---|---|---|---|
| Extrusion | Solid thermoplastic filament | Mandatory for steep overhangs | Low equipment cost, broad material selection, simple setup | Visible layer lines, anisotropic weakness, slower print speeds |
| Powder Bed Fusion | Fine polymer or metal powder | Self-supporting (polymers); minimal (metals) | Exceptional strength, complex interlocking parts, no polymer supports | High machine cost, powder handling safety, rough surface texture |
| Vat Photopolymerization | Liquid photopolymer resin | Mandatory, must be manually snipped | Micron-level detail, smooth surfaces, high dimensional accuracy | Chemical handling required, brittle materials, UV sensitivity |
Distinct Advantages of Layer-by-Layer Production
The additive nature of 3D printing provides several structural, economic, and logistical advantages that cannot be matched by subtractive machining or formative molding.
- Rapid and inexpensive prototyping: Instead of waiting weeks or months for external machine shops to fabricate tooling and verify a design, engineers can print functional physical prototypes within hours. This compressed cycle allows teams to test ergonomic fits, verify mechanical clearances, and discover design flaws early in the development timeline, saving immense capital.
- Customized and personalized manufacturing: Traditional manufacturing depends on volume to amortize the high cost of dedicated tooling. In 3D printing, every single piece produced can be completely unique at no additional tooling expense. Because each build is generated directly from an independent computer file, customizing an item simply requires altering its digital model.
- Reduced raw material waste: Conventional machining turns substantial percentages of a solid billet into waste chips that must be gathered, cleaned, and recycled. Additive processes build components solely where mass is functionally required, using only the precise volume of material needed to form the geometry and its temporary supports.
- Unprecedented geometric freedom: By building objects one two-dimensional plane at a time, 3D printers can construct shapes that are impossible to machine with traditional cutting bits. Engineers can embed hollow internal cooling channels, organic curved surfaces, and weight-reducing internal lattice matrices that lower part mass while maintaining mechanical integrity.
Widespread Industry Applications
The versatility of additive manufacturing has led to broad adoption across varied industrial, commercial, and creative sectors, changing how products are conceived and delivered.
Healthcare and Medicine
In medical fields, 3D printing enables patient-matched healthcare solutions. Surgeons routinely import CT scans and MRI datasets into CAD software to print patient-specific anatomical bone replicas, allowing surgical teams to practice complex interventions before entering the operating room. Furthermore, custom titanium bone implants, biocompatible dental crowns, clear orthodontic aligners, and personalized prosthetic limbs can be shaped precisely to a patient's individual anatomy, resulting in superior fit, faster healing times, and improved quality of life.
Industrial Manufacturing
Within manufacturing plants, 3D printing has transitioned from a design-check utility into a vital factory-floor tool. Manufacturing facilities employ desktop and industrial printers to produce custom assembly jigs, fixtures, robotic gripper end-effectors, and alignment guides tailored to specific assembly lines. Producing these factory aids in-house reduces machine downtime and avoids vendor backlogs. Furthermore, companies utilize additive manufacturing for on-demand spare part replacement, fabricating discontinued or rarely requested components locally instead of maintaining massive physical warehousing operations.
Architecture and Construction
Architects have long used additive technology to replace time-consuming handmade balsa wood or foam scale models with precise, monolithic architectural models printed straight from structural design software. On an industrial scale, oversized gantry systems and robotic arms fitted with concrete extrusion nozzles are now used to deposit fluid mortar mixes layer by layer to construct walls, decorative facades, civil infrastructure, and entire homes, reducing on-site labor requirements and minimizing material waste during building erection.
Education and Academic Research
Academic institutions use 3D printing to make abstract theoretical concepts physically tangible in the classroom. Engineering students can iterate physical mechanisms, robotics teams can rapidly manufacture custom brackets, and chemistry educators can print physical molecular arrangements that students can manipulate. In university research laboratories, additive manufacturing enables the custom fabrication of bespoke experimental apparatuses, fluidic manifolds, and sensor enclosures tailored to novel scientific experiments.
Art and Design
Contemporary artists, sculptors, and jewelry designers use 3D printing to generate intricate decorative pieces that would be nearly impossible to carve, chisel, or cast by hand. Designers can use generative design algorithms to produce mathematical fractals and organic, bone-like geometries in digital space, which are then fabricated in plastics or cast in precious metals using investment-casting resins. This integration blends algorithmic precision with sculptural aesthetics.
Navigating Technical Limitations and Industry Challenges
While additive manufacturing continues to gain ground across commercial sectors, it is not a universal replacement for conventional production methods. Several technical hurdles must be considered before adopting the technology for commercial production.
Quality, consistency, and structural anisotropy: Most 3D-printed parts exhibit mechanical anisotropy, meaning their physical strength differs depending on the direction of applied stress. Because the part is composed of stacked layers, the mechanical bond between layers along the Z-axis is typically weaker than the solid tensile strength across the continuous X and Y planes. If a functional part experiences shearing stress along its layer boundaries, it may delaminate prematurely. Achieving repeatable tolerances across different machines, environmental humidities, and print batches remains a major hurdle for mission-critical industrial applications.
High capital and material costs: Although entry-level consumer extrusion printers have dropped in price, industrial powder bed fusion and production-grade resin machines require significant capital investments, often costing tens or hundreds of thousands of dollars. Furthermore, specialized raw materials—such as aerospace-certified metal powders, medical-grade photopolymers, and flame-retardant thermoplastics—carry significant markups over conventional plastic pellets and sheet metals used in standard manufacturing.
Intellectual property and digital piracy: Because 3D printers rely solely on digital files, proprietary designs can be shared and reproduced without authorization. High-resolution 3D scanners make it possible to reverse-engineer physical products, generate accurate surface meshes, and distribute them across online repositories. Manufacturers of patented mechanical components and luxury consumer goods face growing challenges in protecting their intellectual property from unauthorized digital replication.
Health, safety, and environmental considerations: Melting thermoplastics at high temperatures can generate ultrafine airborne particulates and volatile organic compounds, requiring clean airflow or active charcoal and HEPA filtration in confined workspaces. Liquid photopolymer resins present contact risks, requiring protective gloves, eye protection, and responsible hazardous-waste disposal for solvent baths. Metal powders present combustibility risks and inhalation hazards, requiring specialized personal protective gear and inert-gas operating atmospheres.
Step-by-Step Workflow: From Digital Concept to Physical Part
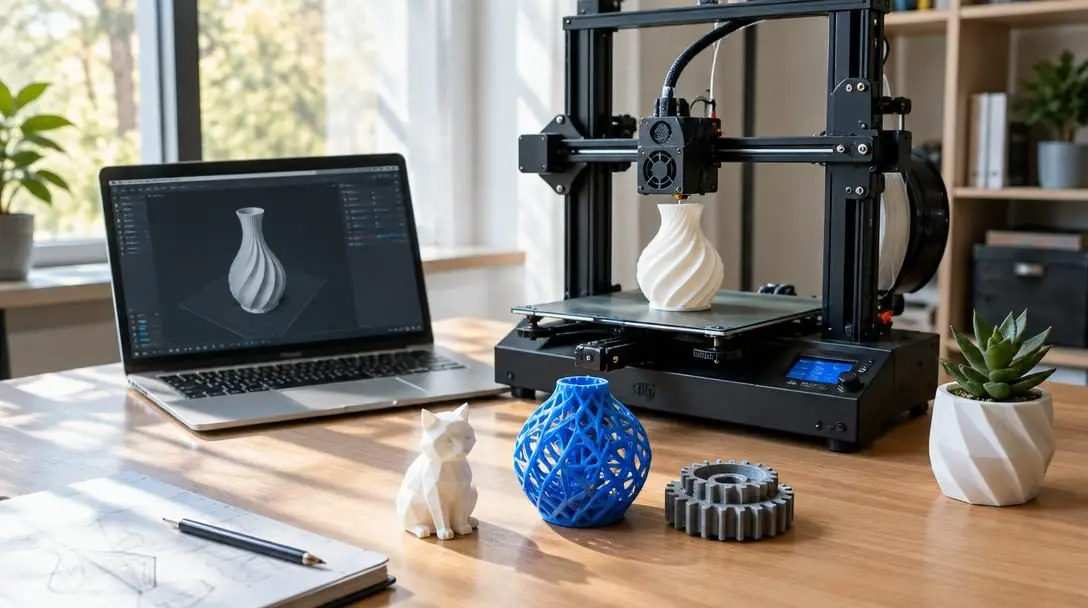
Transforming a digital idea into a reliable, durable physical object requires a systematic series of technical phases. Bypassing essential steps in model preparation or machine setup often results in ruined prints and wasted material.
- Define the functional objective: Determine the operating environment of the finished part before modeling. Establish whether the component needs to withstand high operating temperatures, endure outdoor UV exposure, resist chemical solvents, or support substantial mechanical loads. These requirements dictate whether to choose an extrusion, resin, or powder method, as well as the specific raw material needed.
- Generate the digital CAD model: Create the component geometry using three-dimensional computer-aided design software. During modeling, incorporate practical design rules for additive manufacturing: maintain consistent minimum wall thicknesses, avoid unsupported horizontal surfaces where possible, and chamfer lower edges to minimize print platform expansion.
- Export and inspect the mesh geometry: Export the finalized design from CAD into a standard polygon mesh format, such as an STL, OBJ, or 3MF file. Inspect the exported model in an analysis tool to ensure the surface mesh is manifold—meaning it is entirely watertight, contains no non-manifold edges, and is free of inverted surface normals or internal self-intersecting planes.
- Slice the model into machine toolpaths: Import the clean 3D file into specialized slicing software configured for your specific printer model. Select the optimal build orientation to align layer lines away from primary stress directions. Configure key parameters, including layer height, wall line counts, internal infill percentage and pattern, nozzle temperature, and automated support generation. The slicer will process the geometry into sequential G-code commands that direct machine movements.
- Prepare and calibrate the printer hardware: Clean the build surface using an approved solvent like isopropyl alcohol to remove skin oils, dust, and residual plastic. Verify that the build platform is parallel to the print head across its entire area, and check the baseline gap between the nozzle or optical plate and the build platform. Confirm that the feedstock material is dry, free of dust, and adequately loaded.
- Execute the print and observe initial layers: Send the compiled instructions to the printer and start the build cycle. Remain with the machine to monitor the laying down of the initial layer. The first layer is the most critical phase of the print; inadequate squish, uneven bed gaps, or localized detachment will inevitably cause the entire print to warp or break loose during later hours of the build.
- Perform post-processing and finishing: When the machine completes the run and cools, carefully detach the part from the platform using a release blade. Remove temporary support structures using flush snips or pliers. Depending on the printing technology used, clean the part in solvent baths, cure it under secondary ultraviolet lights, sand surface layer boundaries, or bake it in a sintering oven to achieve full mechanical density.
Critical Printing Mistakes and How to Avoid Them
Mastering additive manufacturing involves a learning curve. Understanding the most common operator oversights can prevent print failures and save considerable time and material.
- Ignoring part build orientation: Positioning a mechanical hook or bracket flat against the build plate versus vertically along the Z-axis fundamentally alters its strength. Slicing a tall, thin component vertically ensures that tensile pulling forces act across layer lines, leading to sudden inter-layer separation under load. Always rotate functional parts so that expected physical loads align parallel to the continuous filament tracks of the X and Y planes.
- Neglecting bed leveling and Z-offset calibration: A build plate that is tilted by fractions of a millimeter will produce insufficient squish on one side of the platform and scratch the nozzle on the other. This causes poor bed adhesion, corner curling, and complete print detachment mid-cycle. Regularly check bed flatness and verify your initial Z-offset before initiating long print runs.
- Omitting or misconfiguring support structures: Additive systems cannot deposit liquid or semi-molten material into open air without severe drooping, sagging, or plastic spaghetti formation. As a rule of thumb, overhangs that exceed 45 degrees from vertical require sacrificial support scaffolding beneath them. For complex organic shapes, consider using tree-style supports to minimize contact scarring and make post-print removal easier.
- Storing raw materials in humid ambient air: Many common printing feedstocks, particularly nylon, PETG, and standard PLA filaments, are hygroscopic. They readily absorb moisture molecules from ambient air. When wet filament reaches the heated nozzle, the trapped water instantly boils into steam, causing popping sounds, severe surface bubbling, stringing artifacts, and weakened layer lamination. Store all filaments in sealed dryboxes containing active desiccant pouches.
- Running print speeds beyond mechanical limits: Accelerating print speeds without tuning temperature, acceleration, and jerk profiles often causes stepper motors to skip steps, shifting layers sideways and ruining the part. High print speeds also cause ringing or ghosting artifacts around sharp corners. Prioritize dimensional accuracy and surface quality by running critical perimeters at moderate speeds.
Frequently asked questions
What is the difference between infill percentage and shell thickness?
Shell thickness refers to the solid outer walls, top surfaces, and bottom layers that form the visible, protective exterior skin of a 3D-printed part. Infill percentage refers to the internal density within those outer walls, which is typically printed as a hollow geometric grid, honeycomb, or gyroid pattern. Increasing shell thickness generally adds more structural rigidity and puncture resistance to a part than simply increasing the internal infill percentage.
Can 3D-printed parts be made fully waterproof or airtight?
Standard extrusion prints are rarely watertight straight off the print bed because microscopic voids frequently exist between adjacent layer lines and toolpath seams. To make an extrusion print watertight, operators must increase wall counts, slightly over-extrude material, tune temperatures to promote complete layer fusion, or coat the finished part with an epoxy resin sealant. Vat photopolymerization prints, by contrast, are inherently non-porous and achieve watertight performance more easily.
Why do the corners of 3D prints lift and warp off the build plate?
Warping occurs due to thermal contraction. As hot thermoplastic is deposited onto the build surface, it naturally shrinks as it cools toward room temperature. If the temperature differential between the freshly extruded plastic and the build plate is too steep, internal stresses build up within the part. These mechanical forces pull the corners upward and off the build surface. Warping can be reduced by using a heated bed, applying build-surface adhesives, using an enclosed print chamber, and turning off cooling fans during the initial layers.
Is 3D printing practical for high-volume mass production?
For producing hundreds of thousands or millions of identical consumer goods, traditional formative manufacturing methods like injection molding remain significantly faster, cheaper per unit, and more consistent. 3D printing is best suited for low-to-medium volume production runs, rapid prototyping, highly customized goods (such as dental retainers or personalized prosthetics), and replacement parts where cutting hard metal molds would be cost-prohibitive.
How safe is it to run a 3D printer in a home living space?
Standard desktop extrusion printers using basic PLA filament produce relatively low odor and emissions, though operating them in well-ventilated areas is still recommended. Printers utilizing ABS, nylon, or volatile technical filaments emit higher concentrations of ultrafine particles and styrene vapors, requiring dedicated enclosures with HEPA and activated-carbon exhaust filtration. Liquid resin printers should always be operated in well-ventilated areas away from living spaces due to chemical fumes and skin-sensitization hazards.
The bottom line
3D printing represents a fundamental shift in how human beings translate imagination into tangible objects. By replacing the subtractive waste of machining and the rigid economics of molding with software-driven, layer-by-layer fabrication, additive manufacturing gives designers unprecedented power to innovate, customize, and iterate on demand.
Succeeding with modern 3D printing requires understanding that the technology is an integrated process rather than a standalone appliance. Print quality and mechanical integrity depend on sound CAD modeling, careful slicer tuning, appropriate material selection, and rigorous post-processing. As printer hardware becomes more accessible and advanced materials continue to emerge, additive fabrication will play an increasingly central role across desktop workshops, research laboratories, and global industrial manufacturing floors.