5 Tips for Making Jellies and Jams
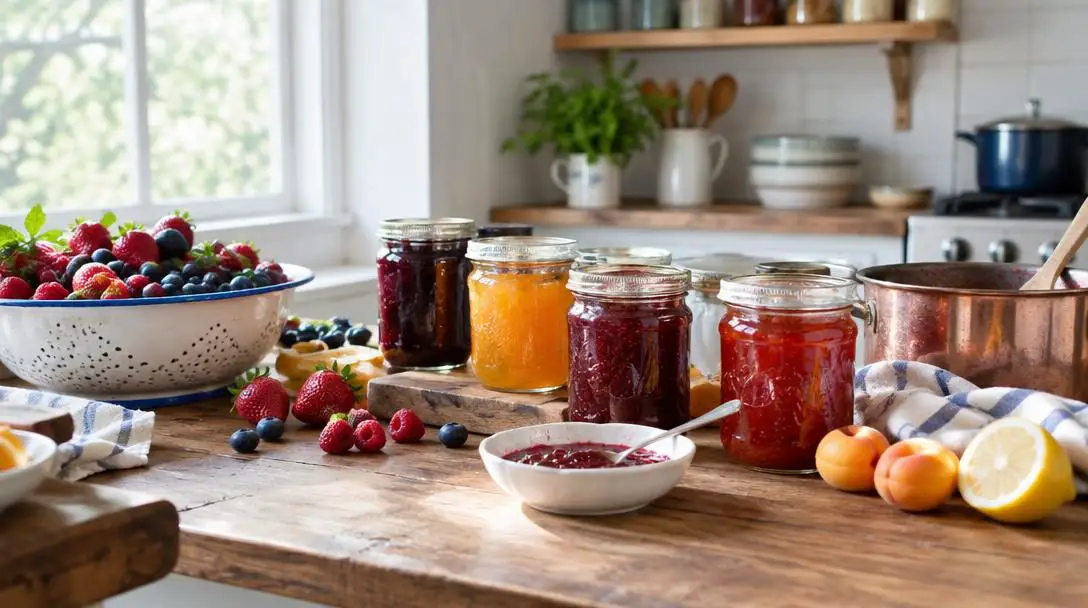
Transforming sweet produce into vibrant homemade fruit spreads is one of the most rewarding culinary traditions you can practice in your kitchen. Whether you prefer making traditional cooked jams and jellies that are shelf-stable for the long haul or opting for quick, low-fuss freezer varieties, capturing the essence of ripe fruit allows you to enjoy pantry-ready delights well beyond harvest season. While working with whole, fresh fruit delivers the deepest and most vibrant flavor profile, home cooks can also rely on canned fruit juice when fresh produce is out of season or difficult to source.
Regardless of whether you start with whole orchard fruit or filtered juice, preserving is an exact science where precision makes all the difference between success and disappointment. Successful jelly making depends on a delicate equilibrium of natural components, added sugar, heat exposure, and cooking times. Following your chosen recipe to a "T" ensures your spreads achieve the ideal consistency without turning into syrupy liquid or dense, rubbery blocks. When prepared with care and properly processed in a boiling water bath, your jars will achieve a reliable, airtight seal capable of keeping your preserves fresh for up to a couple of years.
Key takeaways
- Preserving fruit spreads requires exact adherence to recipe instructions to balance sugar, heat, and texture.
- Pre-measuring ingredients before heating prevents scorched pots and measurement mistakes when handling large volumes of sugar.
- Only unsweetened, all-natural juices should be substituted for fresh fruit to avoid destabilizing the recipe's sugar ratio.
- Maintaining a timed, uninterrupted rolling boil is critical for activating the set of your jam or jelly.
- Wiping jar rims thoroughly before water bath processing ensures an airtight seal that protects preserves against bacterial growth.
Understanding the Science: How Preserves Set and Keep
Creating a balanced spread is far more technical than simply boiling fruit and sugar together. At its core, jam and jelly making is a chemical transformation driven by three essential components: sweetness balance, thermal energy, and hermetic sealing. Preserving formulas require substantial amounts of sweetener, with standard recipes frequently calling for 6 to 8 cups of sugar. This sugar serves a functional role beyond mere flavor; it directly interacts with the natural moisture and intrinsic elements of the fruit during simmering to build the spread's characteristic gel-like body. Without enough sugar, the moisture remains unbonded, and the mixture cannot form a stable gel.
Heat management dictates whether that gel successfully forms. Preserves require intense thermal exposure to reach a true rolling boil, which is a vigorous boil that does not stop bubbling even when stirred. This rapid bubbling creates the concentrated heat needed to trigger the structural set of the spread. If your mixture fails to reach this critical thermal threshold, the spread will remain loose and watery once cooled. However, managing this heat demands constant vigilance. Because high cooking temperatures are applied to a mixture dense with dissolved sugar, the pot becomes vulnerable to scorching within seconds. Any burnt residue sticking to the bottom will quickly infuse the entire batch with an acrid, bitter aftertaste.
Even a momentary lapse in stirring can cause the high-sugar mixture to scorch, casting a burnt flavor through the entire batch.
Finally, long-term stability relies on creating a pathogen-free storage environment through heat processing. When filled jars are submerged in a boiling water bath, the heat forces trapped air out from beneath the lids. As the jars are removed and cool down to room temperature, the air contracts, creating a powerful vacuum that draws the lid tightly against the rim. This airtight seal prevents oxygen and environmental bacteria from infiltrating the container, keeping your preserves safe, vibrant, and shelf-stable for up to a couple of years.
Selecting and Preparing Your Base Ingredients
The foundation of any exceptional preserve begins long before you set a pot on the stovetop. Your choice of raw ingredients determines the clarity, aroma, set, and longevity of your finished product. While premium whole fruit is always the gold standard, home cooks have several options depending on seasonal availability and pantry supplies.
Fresh fruit yields superior flavor and offers the brightest aromatic quality. Working with whole produce allows you to take advantage of natural fruit structures that enhance texture. You do not need pristine, cosmetically perfect fruit from the market; slightly bruised pieces are completely acceptable and melt down nicely during simmering. However, fruit with extensive bruising must have those damaged sections carefully cut away and discarded. Any stems, leaves, moldy areas, or fully rotten fruit must be sorted out and removed entirely to prevent off-flavors and microbial spoilage.
When fresh produce is inaccessible, canned fruit juice serves as a reliable pantry alternative for making sparkling jellies. If you choose this path, you must select 100 percent all-natural, unsweetened fruit juice. Flavored juice cocktails and artificially enhanced blends yield poor results and often fail to gel. Furthermore, commercially sweetened juices introduce uncontrollable variables into your recipe. Because juice manufacturers add widely disparate amounts of corn syrup or refined sugar, attempting to adjust a standard preserving recipe for sweetened canned juice is virtually impossible. Starting with plain, unsweetened juice keeps your sugar ratios accurate and predictable.
| Ingredient Type | Flavor Quality | Preparation Effort | Recipe Predictability | Recommended Usage |
|---|---|---|---|---|
| Fresh Whole Fruit | Highest, rich aroma | Moderate (sorting, trimming, de-stemming) | High (standard baseline) | Ideal for all cooked jams and freezer spreads |
| Unsweetened Canned Juice | Clean, consistent | Low (ready to measure and pour) | High (predictable sugar baseline) | Excellent substitute for clear cooked jellies |
| Sweetened / Flavored Juice | Artificial or unbalanced | Low (ready to pour) | Very Low (unpredictable additives) | Not recommended; causes set and flavor failures |
5 Essential Tips for Making Jellies and Jams
The active cooking window for preserves moves quickly and allows no room for hesitation. Implementing structured habits and refining your technique will keep your kitchen organized and your spreads consistent batch after batch.
Tip 1: Sterilize Jars and Stage Your Workspace in Advance
Once your preserves hit the stove, you will not have time to wash containers or search for misplaced tools. Jars must be fully sanitized to prevent dormant fungal spores and bacteria from spoiling your food once it is sealed. You can efficiently sterilize your glass canning jars by running them through a complete cycle in your dishwasher right before cooking. Keep the sterilized jars, bands, and clean lids arranged within arm's reach of your stove, resting on a clean surface or towel. Having everything organized beforehand ensures you can fill containers immediately while the mixture is piping hot.
Tip 2: Carefully Inspect and Clean Your Produce
Do not dump flats of fruit directly into your pot without inspecting each individual piece. Sort through berries, stone fruits, or apples methodically. Strip away all woody stems, calyxes, and stray leaves that add unwanted bitterness. Cut out and discard soft, water-soaked, or badly bruised areas with a sharp paring knife, keeping the healthy flesh intact. Slightly bruised fruit can remain in the mix, as it cooks down readily. Completely rotten, moldy, or fermented pieces must be discarded immediately, as even a small quantity of spoiled fruit can corrupt the taste and microbiological safety of the entire batch.
Tip 3: Pre-Measure Every Ingredient into Separate Bowls
Preserving demands swift additions at specific boiling stages. Because recipes frequently require 6 to 8 cups of sugar, attempting to scoop and measure directly from the bag over an active stove is an invitation to disaster. It is exceptionally easy to lose count midway through scooping, throwing your ratios completely out of balance. Worse, taking your eyes off the pot to measure ingredients while the fruit is cooking will almost certainly result in scorched fruit. Measure your liquid juice or prepared fruit, your sugar, and any other recipe requirements into dedicated prep bowls before applying any heat to the stove.
Tip 4: Stir Continuously Using Wooden or Metal Utensils
Tool selection and physical technique are essential for preserving success. Always choose a rigid, heavy-duty wooden spoon or a long-handled stainless steel spoon to tend your pot. Never use standard plastic spoons or spatulas; boiling sugar syrups reach temperatures well above the boiling point of water, which will easily soften, warp, or melt plastic directly into your preserves. Once your pot is on the burner, stir continuously from edge to center. Do not walk away or stop stirring, even for a few seconds. The heavy sugar mixture settles rapidly against the bottom of the pan, and constant movement is the only way to prevent severe scorching.
Tip 5: Reach and Time an Uninterrupted Rolling Boil
A gentle simmer will not provide the necessary thermal environment to set your preserves. You must bring the contents of your pot to a vigorous rolling boil that bubbles relentlessly across the entire surface. If you see bubbles forming around the edges but the bubbling subsides when you stir, the pot has not yet reached a rolling boil. Once the bubbling persists through vigorous stirring, activate an accurate kitchen timer. Adhere strictly to the cooking duration specified in your recipe; guessing or relying on visual estimates will lead to batches that are undercooked and soupy, or overcooked, dark, and stiff.
Step-by-Step Processing from Pot to Pantry
Executing the final filling and sealing steps with methodical care protects your hard work and guarantees shelf stability. Follow this sequence once your boiling time is complete:
- Remove the hot pot from the burner and turn off the heat source to stop the cooking process immediately.
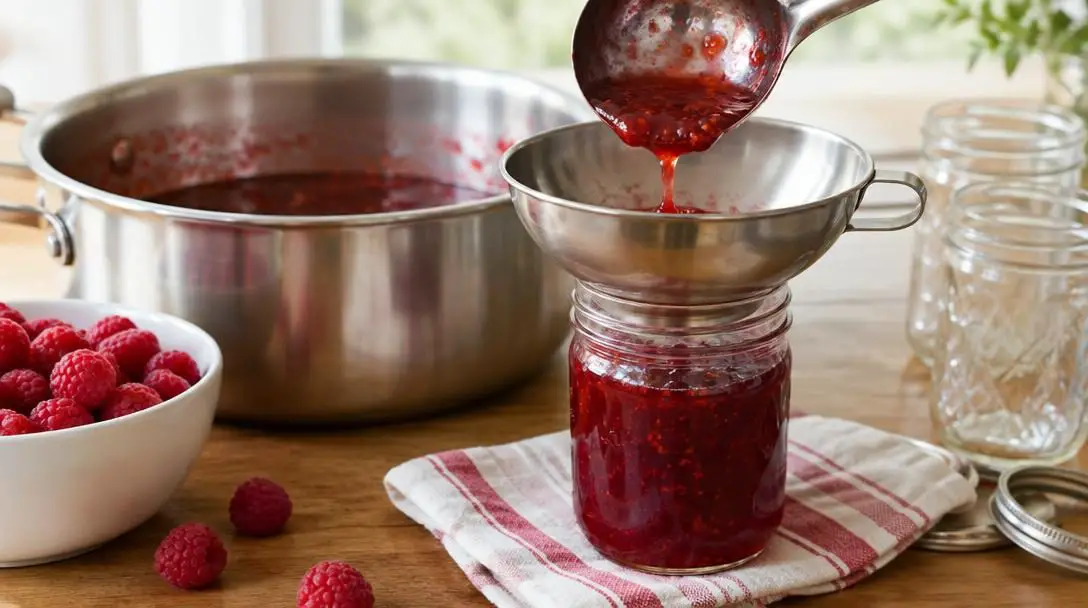
- Ladle the bubbling jelly or jam directly into your pre-sterilized, warm canning jars using a wide-mouth funnel, leaving the headspace specified in your recipe.
- Moisten a clean paper towel or lint-free cloth and wipe the rim and threads of each jar thoroughly to remove every trace of sticky syrup, fruit debris, or sugar crystals.
- Place a clean lid flat onto the center of each jar rim, ensuring the sealing compound rests evenly against the glass.
- Screw the metal band down fingertip-tight over the lid without over-tightening or forcing the ring.
- Lower the filled jars into your water bath canner, ensuring they are fully submerged, and process for the exact time required by your tested recipe instructions.
- Remove jars carefully without tilting them and allow them to rest undisturbed at room temperature for 12 to 24 hours to form a permanent, airtight seal. For freezer jams, skip the water bath and follow your recipe's cooling and freezing protocols.
Critical Mistakes That Ruin Home Canning Batches
Even seasoned home cooks occasionally ruin a batch by cutting corners or overlooking fundamental food safety guidelines. Avoiding these frequent processing missteps will ensure your preserves remain delicious and shelf-safe:
- Deviating from recipe measurements: Preserving chemistry requires strict ratios. Arbitrarily reducing sugar, guessing on fruit quantities, or altering boiling durations will prevent the batch from setting or compromise safety.
- Opting for sweetened or flavored store-bought juices: Commercial fruit cocktails contain unknown levels of corn syrup, flavorings, and preservatives that disrupt normal gelling mechanisms. Stick exclusively to 100 percent unsweetened juice.
- Measuring ingredients over an active pot: Scooping dry sugar while fruit boils leads to inaccurate measurements and scorched pan bottoms. Always stage pre-measured ingredients in separate bowls beforehand.
- Using non-heat-resistant plastic utensils: The combination of boiling fruit acids and superheated sugar can melt plastic spoons, ruining your utensil and contaminating the batch with melted polymers.
- Neglecting continuous stirring: Stepping away from the stove for even half a minute allows sugar to settle against the hot base of the pot, scorching the batch and imparting a burnt flavor throughout.
- Guessing on boil times instead of using a timer: Estimating how long your mixture has been at a rolling boil often results in undercooked, runny jams or rubbery, over-concentrated spreads.
- Pouring hot preserves into unsterilized jars: Skipping the sterilization phase leaves bacteria and molds inside the container, which can multiply rapidly under the seal and cause spoilage.
- Failing to clean jar rims before capping: Stray spatters of syrup on the glass rim prevent the lid gasket from making flush contact, resulting in broken seals or spoilage during pantry storage.
Frequently asked questions
Can I safely reduce the amount of sugar called for in my jam recipe?
No, you should not reduce the sugar in standard recipes. Sugar acts as an essential structural binding agent and preservative alongside fruit liquids and heat. Reducing the specified 6 to 8 cups of sugar will prevent the spread from setting properly and compromise its long-term preservation.
Why must I stir the jam continuously while it is on the stove?
Preserves contain concentrated levels of sugar that sink rapidly to the bottom of the pot. Stirring continuously prevents the mixture from sticking to the base, scorching, and circulating an acrid burnt flavor throughout the entire batch.
How can I tell the difference between a regular boil and a rolling boil?
A regular boil produces bubbles that disappear when you stir the liquid. A true rolling boil is vigorous and maintains constant, active bubbling across the entire surface of the pot, even while being vigorously stirred with a spoon.
What happens if I forget to wipe the rim of the jar before placing the lid?
Any residue, fruit pulp, or sticky syrup left on the rim will prevent the lid gasket from adhering flush against the glass. This gap allows outside air to enter the jar, resulting in a failed vacuum seal and encouraging bacterial growth during storage.
How long will my canned jams and jellies last in the pantry?
When properly prepared, cooked to a rolling boil, and processed in a boiling water bath to achieve an airtight seal, canned jams and jellies will remain fresh and safe to eat for up to a couple of years in a cool, dark pantry.
The bottom line
Making homemade jams and jellies is a classic culinary art that bridges science, seasonal bounty, and kitchen discipline. By taking the time to inspect and prep your fruit, measuring every ingredient before heating the pan, using sturdy non-plastic utensils, and timing a vigorous rolling boil to the second, you eliminate guesswork and set yourself up for consistent results. Clean rims and proper water bath canning lock in the natural sweetness of your harvest, rewarding your efforts with sparkling, flavorful spreads that your family can enjoy for up to a couple of years.