The Benefits of Vermicomposting: Turning Your Food Scraps into Rich Compost
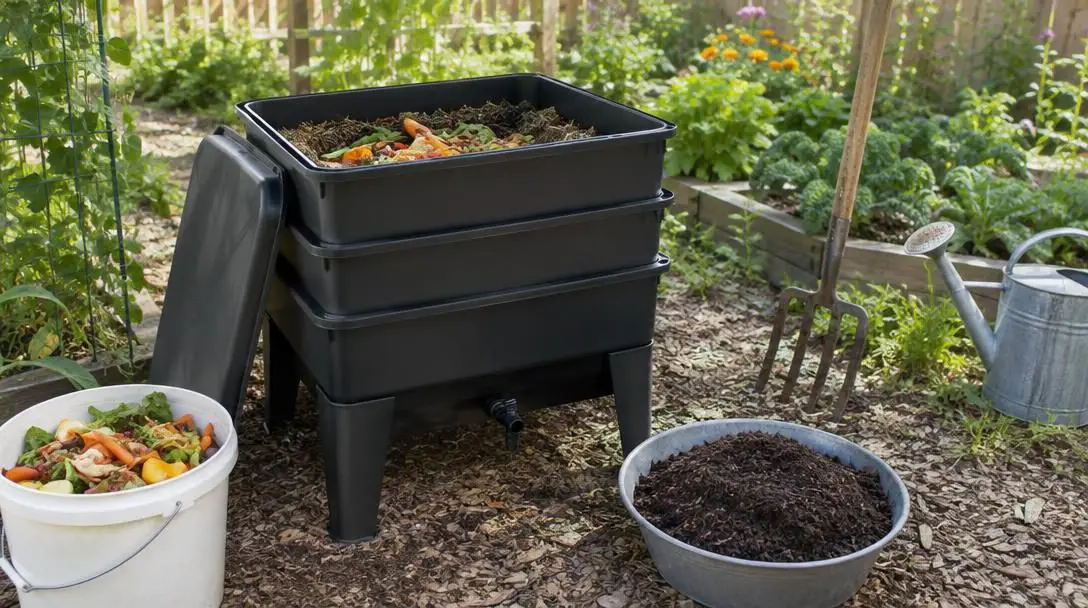
Every household generates organic food scraps on a daily basis. Vegetable peelings, fruit cores, coffee grounds, and trimmings routinely accumulate on kitchen cutting boards during meal preparation. In most conventional homes, this nutrient-dense biological matter is bundled into plastic garbage bags and hauled away for municipal waste processing. Once buried inside a landfill, organic refuse is treated as useless garbage, where it breaks down slowly and releases potent greenhouse gases into the atmosphere.
Fortunately, an accessible and ecologically sound alternative exists right at home: vermicomposting. By harnessing the natural digestive power of earthworms and beneficial microorganisms, vermicomposting transforms standard kitchen leftovers into an exceptionally dark, biologically active fertilizer and soil conditioner. Because a worm bin operates as a self-contained miniature ecosystem, it requires neither vast acreage nor heavy machinery, offering apartment dwellers and suburban gardeners alike a practical way to divert waste and revitalize soil health.
Key takeaways
- Vermicomposting relies on earthworms and beneficial microorganisms to convert routine kitchen scraps into dark, nutrient-rich vermicompost and worm castings.
- The resulting compost delivers higher concentrations of nitrogen, phosphorus, and potassium than traditional compost, improving soil aeration, drainage, and moisture retention.
- Diverting kitchen waste from municipal landfills mitigates the production of methane, a potent greenhouse gas that drives climate change.
- A compact plastic bin filled with damp bedding and red wiggler worms can thrive indoors or outdoors without producing foul odors when properly managed.
- Avoiding overfeeding, maintaining wrung-out sponge moisture, and excluding meat, dairy, and oils are the keys to a trouble-free system.
The biological mechanics of vermicomposting
At its foundation, a vermicomposting bin functions as an efficient, living bioconverter. While traditional hot composting depends on large volumes of organic mass that generate significant internal heat through bacterial thermogenesis, vermicomposting works at moderate temperatures driven by the synergy between specialized earthworms and microscopic decomposers. When food waste enters the bin, billions of naturally occurring bacteria and fungi colonize the scraps, softening tough plant fibers and beginning the chemical breakdown.
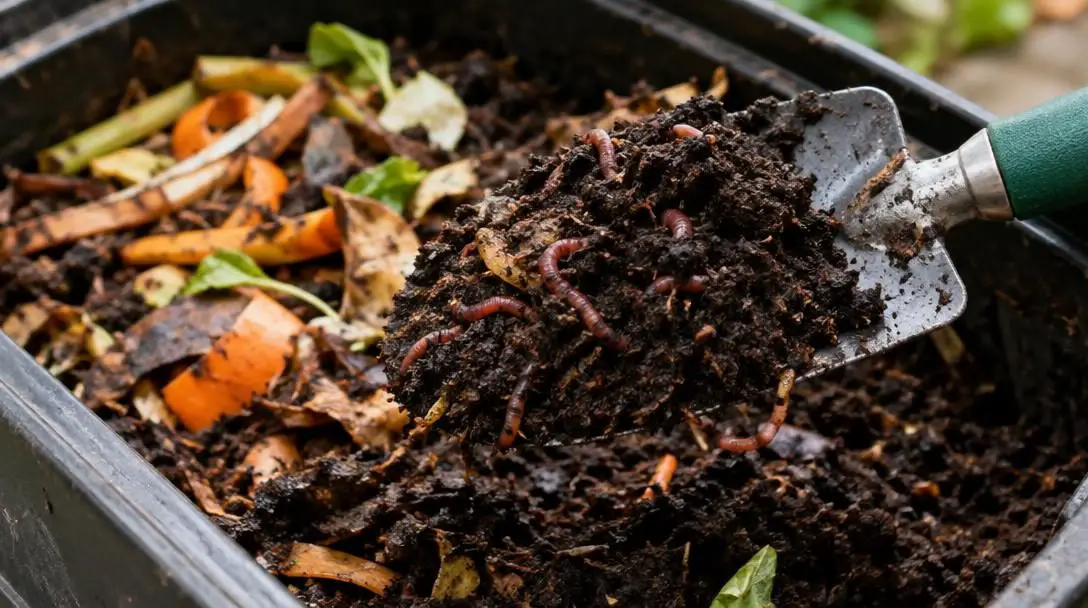
As the waste softens, earthworms ingest both the decomposing food tissues and the dense colonies of microorganisms. Lacking teeth, the worms rely on small abrasive particles in their digestive tracts to mechanically grind the ingested material into a fine slurry. Within the worm's digestive system, organic matter blends thoroughly with biological compounds and beneficial microbes before being excreted. These excreted wastes, widely known as worm castings, represent one of the most stable and biologically active plant amendments on Earth.
By routing food waste through the digestive tract of earthworms, vermicomposting closes the loop between kitchen leftovers and regenerative agriculture.
Over several months of consistent feeding, the original bedding material and added scraps gradually merge into a homogeneous, dark brown substance termed vermicompost. When applied to agricultural or garden soil, this finished material immediately alters physical soil properties. Heavy, dense clay soils become noticeably lighter, developing porous channels that allow delicate roots to expand and water to drain effectively. Conversely, loose and sandy soils gain organic cohesion, developing the sponge-like capacity to retain water and dissolved minerals that would otherwise leach away during irrigation.
Major environmental and gardening benefits
Implementing a home vermicomposting system addresses environmental challenges at both ends of the consumption cycle. It provides an immediate waste-diversion solution at the point of origin while producing a premium soil treatment that outperforms many store-bought fertilizers.
Nutrient-rich natural fertilizer
Finished vermicompost is far more than simple decomposed vegetation; it serves as a concentrated, slow-release biological fertilizer. Lab analyses show that vermicompost contains a higher percentage of primary plant nutrients—specifically nitrogen, phosphorus, and potassium—than traditional yard-waste compost. Furthermore, because these nutrients have passed through a biological digestive tract, they exist in forms that plant roots can assimilate easily, encouraging vigorous root proliferation, strong stem growth, and bountiful yields in vegetable patches and potted houseplants alike.
Methane reduction and smaller carbon footprint
Whenever raw food scraps travel to municipal landfills, they are deeply buried beneath mountains of compacted refuse. This dense packing cuts off fresh air circulation, creating an anaerobic (oxygen-free) environment. Under anaerobic conditions, decomposing organic materials produce massive volumes of methane, a destructive greenhouse gas with a warming potential many times greater than that of carbon dioxide. Managing food scraps through domestic vermicomposting maintains continuous oxygen exposure, preventing the formation of methane and directly reducing your household carbon footprint.
Landfill waste diversion
Food scraps represent a substantial percentage of the everyday residential waste stream. When families routinely divert organic peels, grounds, and cuttings into a worm bin, the volume of solid garbage placed at the curb decreases significantly. This domestic diversion relieves strain on municipal collection fleets, extends the operating lifespan of regional landfill facilities, and keeps valuable organic matter circulating within local ecological boundaries rather than sealing it underground forever.
Accessible indoor and outdoor use
Unlike bulky compost tumblers or outdoor open-air piles that require expansive yards and frequent turning with pitchforks, vermicomposting fits comfortably within small footprints. Because healthy worm bins do not produce offensive odors, they can be housed in closets, basements, utility rooms, kitchen cabinets, or sheltered apartment balconies. This spatial flexibility ensures that urban apartment dwellers without outdoor garden space can actively participate in ecological waste reduction.
Comparing household waste management methods
Understanding how vermicomposting compares to conventional waste disposal and traditional hot composting illustrates why worm bins represent such an appealing balance of convenience and biological efficiency.
| Method | Space Requirements | Biological Mechanism | Primary Byproduct | Environmental Impact |
|---|---|---|---|---|
| Vermicomposting | Minimal; indoor closets, cabinets, or balconies | Aerobic digestion by red wigglers and microbes | Nutrient-rich castings and vermicompost | Eliminates methane; generates potent fertilizer |
| Traditional Hot Composting | Moderate to large; outdoor yards or open beds | High-heat thermophilic bacterial decomposition | Coarse organic soil amendment | Aerobic diversion; requires space and turning |
| Municipal Landfill Disposal | None inside home; standard curbside bin | Anaerobic decomposition under dense trash layers | Compact buried refuse and leachate | Produces high volumes of potent methane gas |
Step-by-step guide to starting your worm bin
Establishing an active vermicomposting system requires very little specialized hardware. By assembling an appropriate container, preparing a balanced bedding layer, and introducing the correct species of earthworms, you can establish a self-regulating indoor ecosystem in under an hour.
- Select an appropriate container: Choose a shallow, opaque plastic storage bin or a purpose-built commercial worm farm. If repurposing an everyday plastic tote, drill a series of small ventilation holes through the upper perimeter and the lid to ensure continuous oxygen flow for the organisms inside.
- Prepare the moist bedding: Shred unbleached cardboard, newspaper, coconut coir, or dry leaves into thin strips. Submerge the material in water and squeeze it firmly until it holds the moisture level of a wrung-out sponge. Fill the bin approximately halfway with this damp bedding, fluffing it gently so it remains airy, and scatter a small handful of garden soil across the surface to introduce beneficial microbes.
- Introduce red wiggler earthworms: Obtain a starting population of red wigglers from a local gardening center or reputable online grower. Gently release the worms onto the surface of the damp bedding. Because these creatures are photosensitive, they will quickly burrow downward into the dark bedding layer to escape the light.
- Establish a measured feeding routine: Place small quantities of suitable kitchen scraps directly on top of the bedding or slightly beneath the surface. Add fresh food approximately once per week, monitoring how rapidly the worms consume the material before introducing fresh additions.
- Monitor environmental conditions: Inspect the bin weekly to ensure the bedding remains consistently moist without accumulating standing water at the bottom. Keep the bin in a temperature-stable location away from direct sunlight, freezing drafts, or extreme heat.
What to feed your worms: Safe inputs and prohibited items
Maintaining a thriving worm bin hinges on maintaining biological equilibrium. While earthworms will consume an extensive variety of kitchen scraps, certain items must be strictly excluded to avoid biological imbalances, noxious odors, and pest infestations.
Safe feeding materials
- Fruit and vegetable trimmings: Discarded carrot tops, squash rinds, potato peelings, apple cores, and leafy greens provide an optimal blend of moisture, sugars, and digestible cellulose.
- Coffee grounds: Used coffee grounds break down quickly, blend seamlessly into the surrounding bedding, and are readily consumed by worm populations.
- Crushed eggshells: Finely pulverized eggshells introduce vital minerals and provide microscopic mineral grit that aids the worms' muscular gizzards in grinding down food scraps.
- Dry and moist leaves: Fallen garden leaves supply carbon-rich organic material, acting as a bridge between food source and bedding replenishment.
Materials to avoid entirely
- Meat and animal carcasses: Animal proteins break down very slowly in a vermicomposting bin, generating foul putrid smells and attracting flies, rodents, and other scavengers.
- Dairy products: Milk, cheese, butter, and yogurt curdle, create sour acidic conditions that endanger worm health, and produce unpleasant odors.
- Oils, fats, and grease: Oily residues coat the bedding and food waste, sealing out oxygen, impeding worm respiration, and creating anaerobic dead zones within the container.
Troubleshooting common vermicomposting mistakes
Although vermicomposting is exceptionally low-maintenance once balanced, beginners occasionally stumble into preventable operational errors. Identifying and rectifying these common issues early keeps the system clean and odor-free.
Overfeeding the worm population
Overfeeding represents the single most common cause of worm bin failure. When well-meaning owners deposit massive quantities of fresh produce into the container before the current supply is processed, the excess waste begins to rot anaerobically. This produces foul odors, alters the pH of the bedding, and can drive worms to escape toward the rim. Always verify that previous feedings have been largely broken down before introducing another weekly ration.
Incorrect moisture levels
Worms breathe through their skin, requiring a humid environment to absorb dissolved oxygen. If the bedding dries out, the worms will suffocate and perish. Conversely, if excess moisture transforms the bin floor into standing sludge, oxygen cannot penetrate the bedding, suffocating both the worms and aerobic bacteria. Strive to maintain bedding that feels consistently damp, exactly like a wrung-out sponge.
Poor ventilation
A sealed bin quickly depletes available oxygen, fostering anaerobic microbes that produce sour or rotten egg aromas. If you build your system from a solid plastic storage tote, you must ensure sufficient air holes are drilled across the lid and upper sides. Adequate airflow keeps the ecosystem aerobic, sweet-smelling, and biologically active.
Adding prohibited food waste
Introducing items such as meat trimmings, cheese rinds, or salad drenched in oily dressings will rapidly disrupt the bin's chemical balance. These dense, fatty items decay via putrefaction rather than clean decomposition, attracting nuisance insects and creating unpleasant odors that undermine the convenience of indoor composting.
Selecting the wrong worm species
Not every earthworm found outdoors is suitable for a worm bin. Common deep-burrowing species, such as nightcrawlers and standard garden soil worms, require deep vertical soil columns and do not survive in shallow bins filled with concentrated food waste. Always source red wigglers, an epigeic species naturally adapted to living in shallow organic scrap layers.
Harvesting finished vermicompost and sustaining the cycle
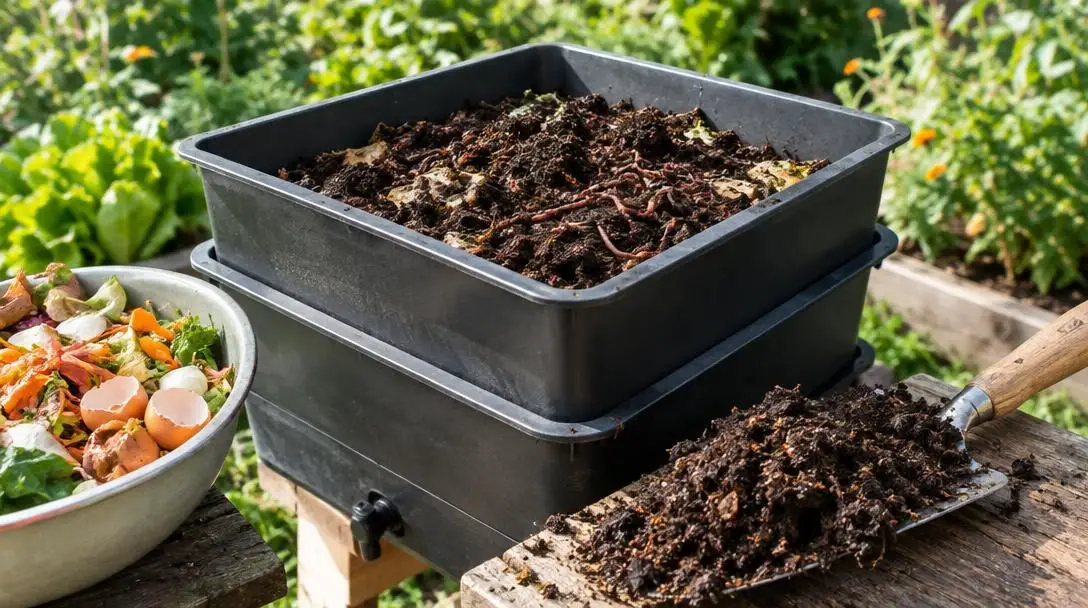
After several months of regular weekly feedings, the original bedding will almost entirely disappear, replaced by a rich, dark, earthy material resembling fine potting soil. When your bin is nearly full and few raw scraps remain recognizable, it is time to harvest your compost and reset the habitat.
The simplest method to separate the worms from the finished compost without harming them is the lateral migration technique. Move all existing material toward one half of the bin, and fill the emptied side with freshly moistened bedding and sweet food scraps. Over the course of two to three weeks, the red wigglers will naturally migrate toward the fresh food source, vacating the finished castings. You can then easily scoop out the finished vermicompost from the vacated side without losing your working population.
Collected vermicompost can be applied across a variety of gardening settings. Blend it into potting soil mixes to bolster aeration and water retention for indoor plants, spread a thin layer around the base of heavy-feeding garden vegetables to supply immediate nitrogen, phosphorus, and potassium, or work it directly into garden beds before spring planting. Once harvested, simply add fresh moistened shredded paper or coir to the bin, restore the weekly feeding routine, and let the ecological cycle continue uninterrupted.
Frequently asked questions
Why can't I just use regular earthworms from my backyard garden?
Standard garden earthworms and nightcrawlers are deep-burrowing species that need deep, vertical soil tunnels and mineral subsoils to survive. Red wigglers are surface-dwelling litter feeders specifically adapted to thrive in shallow, concentrated organic waste environments, making them uniquely suited for vermicomposting bins.
How can I tell if my worm bin has the right moisture balance?
Grab a handful of the bedding material and squeeze it firmly in your fist. It should feel like a wrung-out sponge—moist and cool to the touch, releasing only a drop or two of water under firm pressure. If water streams freely through your fingers, the bin is too wet; if it feels crumbly or dry, lightly mist it with dechlorinated water.
Will an indoor vermicomposting bin smell bad or attract pests?
A well-managed worm bin produces no foul odors; instead, it gives off a pleasant, earthy scent reminiscent of a forest floor. Offensive smells only occur if the bin is overfed, overly wet, under-ventilated, or fed prohibited items like meat, dairy, or oily foods. Excluding these items and maintaining proper airflow prevents flies and unpleasant odors.
How often should I feed the worms in my bin?
Aim to feed your worms approximately once per week. It is best to monitor how quickly the worms consume previous rations before adding new scraps; if significant uneaten food remains from the previous week, pause feeding until the population catches up.
How does vermicompost improve different soil types?
Vermicompost dramatically enhances soil structure across diverse soil profiles. When introduced to dense clay soils, it loosens tightly packed particles, creating channels for root growth and water percolation. In coarse, sandy soils, its rich organic matter binds particles together, dramatically boosting moisture retention and holding onto essential nutrients that would otherwise wash away.
The bottom line
Vermicomposting transforms an everyday chore—dealing with kitchen refuse—into a valuable ecological asset. Rather than dispatching nutrient-dense fruit peels, coffee grounds, and vegetable ends to anaerobic landfills where they generate harmful methane emissions, a simple home worm bin routes those resources directly into regenerative biology. Powered by unassuming red wigglers and microscopic decomposers, this compact, odor-free system yields a premium natural fertilizer packed with nitrogen, phosphorus, and potassium.
Whether you manage a sprawling suburban backyard or reside in a compact urban apartment, setting up a plastic bin with damp bedding and a handful of worms requires minimal investment for maximum ecological return. By feeding measured weekly rations, keeping prohibited animal products out of the bin, and harvesting the rich castings every few months, you can simultaneously shrink your carbon footprint and cultivate living, thriving soil for years to come.