The Ultimate Guide to DIY Home Improvement Life Hacks: 5 Projects to Try
Home improvement often feels like an intimidating endeavor, leaving many property owners discouraged by the steep costs of hiring outside contractors or the fear of mismanaging complex structural alterations. However, revitalizing a residence does not require expansive budgets, specialized trade credentials, or invasive renovations. With steady patience, methodical planning, and accessible tools, homeowners can tackle realistic improvements that dramatically elevate both the look and utility of their everyday spaces.
Engaging in hands-on do-it-yourself upgrades offers an economical avenue for personalizing your living environment while fostering lifelong technical problem-solving skills. Whether you are picking up basic hand tools for the very first time or looking to broaden your woodworking and finishing repertoire, self-directed home upgrades deliver lasting satisfaction. Exploring manageable upgrades—including kitchen backsplashes, wall-mounted greenery, furniture refinishing, updated cabinetry, and overhead fan installations—provides a clear pathway to revitalizing any living space.
Key takeaways
- Undertaking focused do-it-yourself renovations dramatically cuts labor costs while developing durable home maintenance skills.
- Meticulous surface cleaning, scuff sanding, and dry layout planning form the essential groundwork for professional, durable finishes.
- Selecting matching plant profiles for vertical planters and turning off breaker power before electrical work prevents common project failures.
- Applying thin, consistent layers of paint, stain, and sealer yields smoother textures and eliminates drips, peeling, and long cure delays.
At a glance: five versatile home improvement projects
Selecting the right project depends on your immediate design goals, available materials, and comfort level with specific tools. Reviewing project requirements side by side helps clarify which upgrade best suits your schedule and residential priorities.
| Project | Primary Benefit | Key Tools and Supplies | Critical Success Factor |
|---|---|---|---|
| Installing a Backsplash | Moisture and grease barrier | Tiles, notched trowel, grout float, tile cutter | Dry-planning layout to avoid tiny corner cuts |
| Creating a Vertical Garden | Space-saving living foliage | Wood frame, power drill, mounting screws, potting soil | Anchoring for wet soil weight and matching plant needs |
| Refinishing Furniture | Wood restoration and preservation | Sandpaper, paint scraper, wood stain, clear sealer | Sanding strictly along the natural grain line |
| Painting Cabinets | Cost-effective interior modernization | Cabinet paint, primer, fine sandpaper, roller | Applying thin coats over fully primed surfaces |
| Installing a Ceiling Fan | Air circulation and energy savings | Ceiling fan kit, stepladder, wire nuts, screwdrivers | Disconnecting power and confirming junction box rating |
Five practical DIY projects to upgrade your living space
Each of the following assignments targets a distinct room dynamic, offering step-by-step guidance to ensure crisp, safe, and visually appealing results without calling in expensive specialized labor.
Installing a Backsplash
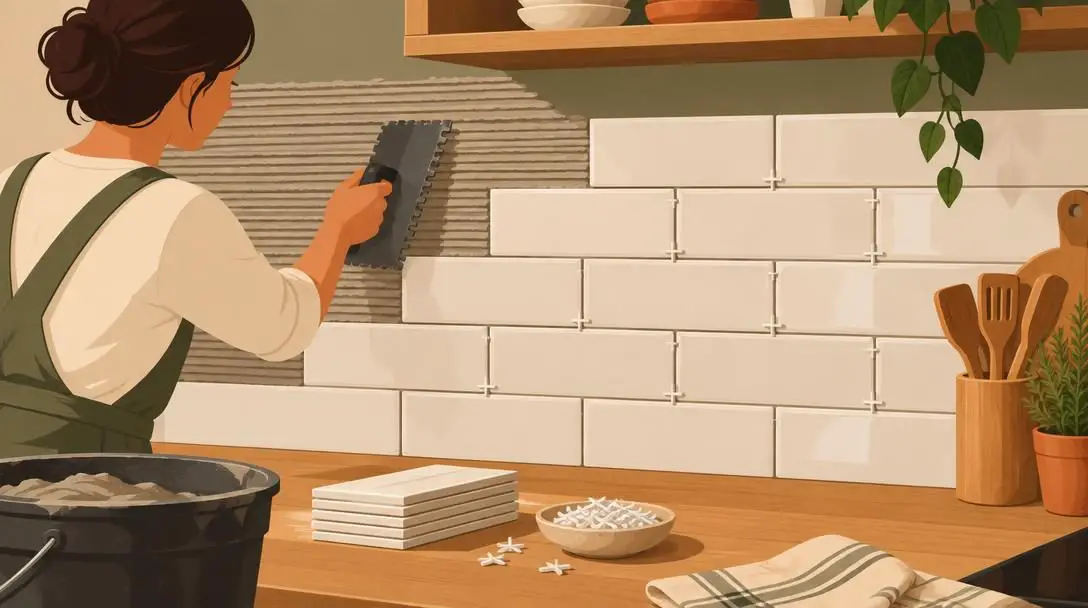
- Primary Function: Shields drywall from moisture, grease, and cleaning residue
- Core Supplies: Tiles, tile adhesive, grout, primer, tile spacers
- Essential Tools: Notched trowel, tile cutter, rubber grout float, clean sponge
A backsplash functions as both a decorative focal point and a structural shield in high-traffic kitchens and bathrooms. Raw drywall located behind sinks, ranges, and prep counters remains constantly vulnerable to water saturation, cooking splatters, and scrubbing detergents. Installing tile creates a nonporous, easily sanitized surface that introduces vibrant textures, clean geometric lines, and complementary room colors.
Successful tile installation depends on careful wall preparation. Begin by washing the vertical surface to remove lingering grease, airborne dust, and food residue. Once dry, coat the installation field with a suitable primer to promote a secure adhesive bond between the substrate and the mortar bed.
- Plan the Layout: Arrange tiles on a flat surface or measure and mark level reference lines across the wall to establish a balanced pattern and prevent unbalanced cuts at corners.
- Apply Adhesive: Use a notched trowel to spread tile adhesive onto the primed wall, combing the bed at an angle to create uniform ridges that allow the tiles to seat evenly.
- Place the Tiles: Press tiles firmly into the combed adhesive, inserting tile spacers at each joint to maintain uniform alignment, and use a tile cutter to trim edge pieces around outlets and cabinets.
- Grout the Joints: Allow the adhesive to cure according to manufacturer instructions, pull out all spacers, and spread mixed grout across the face with a rubber float held at an angle to pack the joints.
- Clean the Surface: Let the grout firm up slightly, then gently wipe away excess paste and lingering haze using a damp sponge, rinsing it regularly in fresh water.
Common tile failures stem from rushing the initial grid layout or over-saturating the sponge during final cleanup. Flooding the fresh tile face with water dilutes the curing grout compound, resulting in washed-out, weakened seams that crack prematurely.
Creating a Vertical Garden

- Primary Function: Maximizes botanical display area using vertical wall space
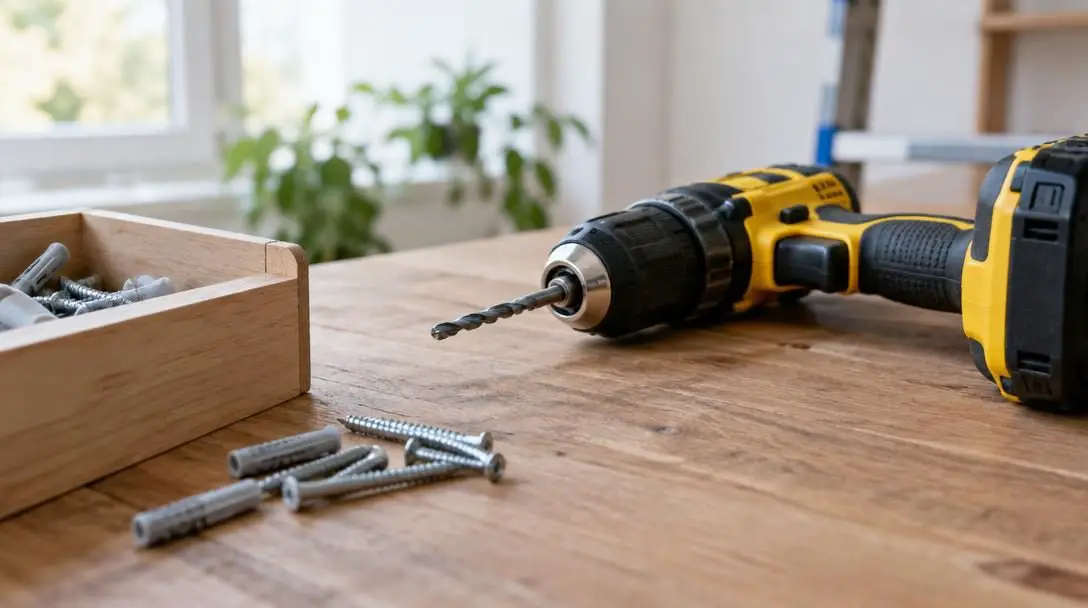
- Core Supplies: Wooden frame, potting soil, mounting screws, selected plants
- Essential Tools: Power drill, drill bits, watering can
Urban apartments and compact residential rooms often lack the floor or tabletop footprint required for an extensive houseplant collection. A wall-mounted living garden solves this constraint by directing growth upward, transforming empty interior walls into vibrant, dynamic architectural displays. Whether cultivated with fragrant cooking herbs, drought-hardy succulents, or cascading blossoms, vertical frames create an immediate natural atmosphere.
A well-designed vertical garden brings the vitality of living botanical design into indoor spaces without sacrificing valuable floor footprint.
- Construct the Frame: Build a sturdy wooden frame matched to your available wall dimensions, confirming that all corner joints and interior brackets are securely joined.
- Mount the Structure: Fasten the wooden structure to the wall using structural screws, making sure the mount is firmly secured into structural studs to bear the combined load of wet soil and plants.
- Drill Planting Cavities: Use your power drill to form neat planting pockets and underlying drainage channels within the frame structure to host healthy plant root systems.
- Add Soil and Plants: Fill the cavities with high-grade potting soil, bed your chosen plants carefully into the pockets, and pack the soil lightly around the root balls to eliminate air gaps.
- Establish a Watering Routine: Hydrate the installation using a watering can and establish a disciplined moisture schedule tailored specifically to the biological needs of your plant varieties.
A frequent error when building living walls is combining plant varieties with contrasting environmental requirements. Grouping moisture-loving herbs alongside arid succulents leads to rot or dehydration. Additionally, builders often underestimate the weight of saturated dirt, emphasizing the absolute need for robust wall anchoring.
Refinishing Furniture
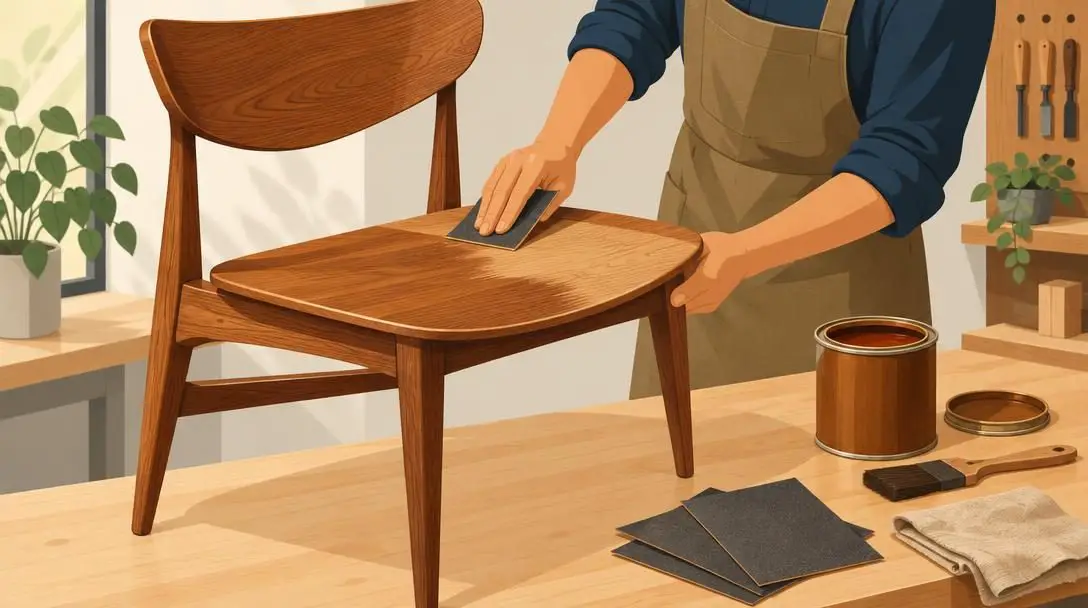
- Primary Function: Restores worn, scuffed, or dated solid wood furnishings
- Core Supplies: Sandpaper in various grits, wood stain, protective clear sealer, cloths
- Essential Tools: Paint scraper, soft-bristle paintbrushes, surface cleaner
Solid wood furniture possesses an enduring structural lifespan, but surface finishes inevitably succumb to scuffs, moisture rings, sun fading, and peeling varnish. Refinishing enables you to salvage second-hand or family pieces, exposing original wood figure while bypassing the expense of purchasing mass-produced modern replacements.
- Strip and Sand: Remove peeling topcoats or stubborn paint with a flat scraper, then sand the entire surface progressively with sandpaper, always moving parallel to the wood grain to remove old clear coats and level out blemishes.
- Apply the Wood Stain: Vacuum away all sanding dust, wipe the surface clean, and apply your chosen wood stain with a soft-bristle brush, letting it penetrate before wiping away excess according to product timing instructions.
- Seal the Surface: Once the stain dries completely, brush on a high-grade clear protective sealer in thin, even sweeps to defend the wood against scratches, spills, and mechanical wear.
The most damaging mistake in furniture restoration is sanding across the natural grain lines. Cross-grain abrasion tears wood fibers, creating deep scratches that trap excess pigment and become glaringly visible once stain is wiped over the piece. Furthermore, brushing on heavy coats of sealer causes unsightly runs, pooling, and prolonged drying times.
Painting Cabinets
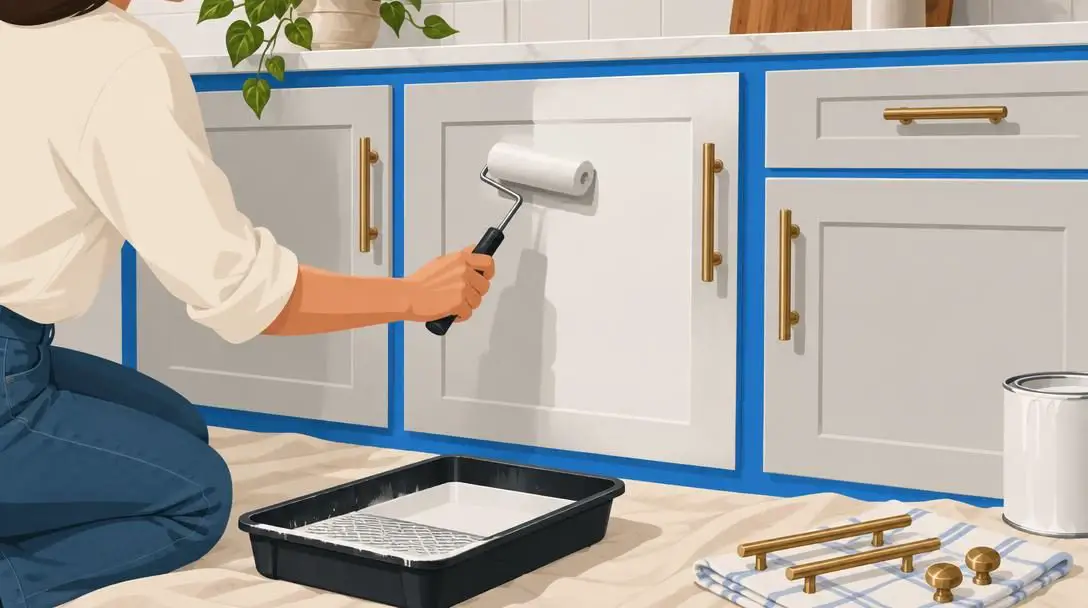
- Primary Function: Updates kitchen and bathroom cabinetry without total replacement
- Core Supplies: Cabinet-grade paint, bonding primer, painter's tape, fine sandpaper
- Essential Tools: Synthetic paintbrush, smooth-nap paint roller, degreasing cleaner
Cabinets define the predominant aesthetic in any kitchen or bathroom layout. Replacing cabinetry entirely involves massive financial commitments, plumbing disruptions, and lengthy downtime. Applying high-performance paint directly over solid wood or sound laminate units provides a clean, custom aesthetic at a tiny fraction of full remodeling costs.
- Sand the Surfaces: Clean doors, drawer faces, and frame elements with a degreasing wash to eliminate cooking oils, remove all metal hardware, and scuff-sand the surfaces using fine sandpaper to promote bonding.
- Apply Primer: Coat the prepared wood or laminate with a uniform layer of bonding primer using a brush or roller, sealing porous grain and stopping dark stains from bleeding through.
- Paint the Structure and Doors: Once the primer cures, apply cabinet paint using a synthetic angled brush for carved recesses and corners, followed by a smooth-nap roller across flat panels for a smooth texture.
- Finish and Reassemble: Allow the topcoat to cure completely, remove all painter's tape, screw the hinges and handles back into place, and reinstall the doors onto the frame.
Neglecting the initial priming step remains the leading cause of peeling cabinet paint. Kitchen cabinetry experiences relentless contact with moisture, fingers, and heat; skipping bonding primer prevents topcoats from adhering mechanically to the underlying substrate.
Installing a Ceiling Fan

- Primary Function: Promotes indoor airflow, comfort, and HVAC energy efficiency
- Core Supplies: Ceiling fan kit, plastic wire nuts, electrical tape, mounting hardware
- Essential Tools: Stepladder, screwdrivers, circuit tester
Installing an overhead ceiling fan delivers dual residential benefits: it improves room circulation during humid seasons and reduces the mechanical load placed on air conditioning and heating equipment. By keeping ambient air constantly circulating, ceiling fans maintain balanced room temperatures, generating energy savings throughout the calendar year.
- Assemble the Fan: Unbox the product and assemble the core structural elements—including the motor housing, downrod, and ceiling canopies—strictly according to the manufacturer’s instructions.
- Secure the Mounting Bracket: Fasten the metal mounting bracket to the overhead electrical ceiling box using the heavy-duty mounting screws supplied in your kit.
- Wire the Unit: Lift the motor assembly to hang on the bracket, then connect matching electrical leads—ground to ground, neutral to neutral, and hot to hot—securing every splice with wire nuts and electrical tape.
- Attach Blades and Restore Power: Mount the individual fan blades to the motor housing using the specified hardware, ensure everything is balanced and tight, and flip the breaker back on to test operation.
The single most hazardous oversight during ceiling fan installation is anchoring the unit to an ordinary light fixture box. Standard ceiling boxes are engineered to support lightweight static lamps, not the physical load and dynamic rotational torque generated by a spinning fan motor. Always confirm that your electrical junction box is structurally rated for ceiling fan duty.
Fundamental DIY safety and workspace principles
Regardless of project scope, maintaining high safety baselines ensures that home maintenance remains rewarding rather than hazardous. Cultivating reliable workshop habits safeguards your physical health and preserves your material investment.
- Wear Personal Protective Gear: Put on impact-resistant safety glasses when cutting tile, using power drills, or scraping paint. Wear a tight-fitting dust mask when sanding wood or handling powdered grout to keep microscopic particles out of your lungs.
- Maintain an Organized Workspace: Tripping over extension cords, misplacing tools, or working in dusty clutter invites accidents and mistakes. Routinely clear away power leads and vacuum surface shavings between project phases.
- Follow Product Instructions Carefully: Building chemical formulations—including tile adhesives, penetrating stains, and cabinet primers—depend on strict environmental conditions. Respect stated drying intervals, room ventilation guidelines, and load ratings.
- Work with the Right Tools: Avoid improvising with dull blades, worn screwdrivers, or incorrect trowel sizes. Using incorrect equipment compromises clean lines, wastes materials, and increases the likelihood of hand slips.
Evaluating and maintaining completed upgrades
Completing your installation represents the beginning of the project's functional lifespan. Taking time to monitor freshly upgraded elements over subsequent weeks allows you to identify subtle shifts, correct loose fittings, and ensure long-term performance.
Inspect tile backsplashes periodically for hairline grout separation near sink rims where counter settlement occurs. Keep an eye on vertical gardens to observe how different plant varietals react to room light, adjusting watering frequency based on soil drainage. For painted cabinets and refinished furniture, avoid scrubbing surfaces aggressively during the first thirty days, allowing topcoats to reach maximum hardness. Observant maintenance reinforces your craftsmanship and keeps home enhancements looking pristine.
Frequently asked questions
Why is primer required before painting cabinets or tiling a backsplash?
Primer prepares slick or porous drywall, laminate, and wood by creating a uniform foundation for bonding. It seals raw surfaces to prevent adhesive from drying out too fast and stops wood tannins from bleeding through topcoats.
Can a ceiling fan be mounted to any standard ceiling light box?
No. Standard electrical boxes are rated only for lightweight, stationary light fixtures. Ceiling fans require a specialized junction box rated to carry dynamic weight and the mechanical vibration of a spinning motor.
Why must wood always be sanded in the direction of the grain?
Sanding across the grain tears delicate wood fibers and leaves horizontal gouges. These cross-grain scratches become noticeably darker and magnified once penetrating stain is wiped across the wood.
What causes tile grout to crack or crumble shortly after installation?
Grout typically fails when it is wiped down with an overly wet sponge during installation, which washes away binders, or when adhesive under the tiles has not cured fully before grout application.
Can I plant succulents and herbs together in the same vertical garden frame?
It is not recommended. Succulents require dry, well-draining soil and sparse watering, whereas culinary herbs demand consistently moist soil. Housing them in the same system often causes succulents to rot or herbs to wither.
The bottom line
Upgrading your living space does not require excessive budgets, outside crews, or whole-house overhauls. By concentrating on accessible projects like tile backsplashes, living vertical gardens, refinished wood furniture, painted storage cabinetry, and ceiling fans, any dedicated homeowner can achieve professional, eye-catching results. Treat preparation with care, respect basic workshop safety, and let each completed task build the skills and confidence needed to take on more ambitious home improvements in the future.